I’ve had a Unifi Security Gateway for over a year now but never had the time or patience to make it work properly. Turns out my ISP really likes to cache MAC addresses so getting the USG to present the pfSense MAC address solved the problem pretty quick. The rest of my gear is all Unifi (48 port switch, 3 APs, Cloud Key Gen 2, 4 video cameras) and I love it. Probably the most reliable network gear I have.
The configuration of the USG is a bit of a PITA though and finding information is hard because they have so much networking gear out there and it seems they’re all configured in different ways.
This post will share the two important things I needed: first, how to change the MAC address for the WAN1 port and secondly, restoring similar behaviour to pfSense’s pfBlockerNG utility which blocks all ad-serving systems by replacing their IP address with 0.0.0.0. Reading a page on macworld.com this morning on my phone made me really sad because of all the ads. I do some surfing outside my home network, rarely… mostly I notice that the weather network app has ads when I’m not home that aren’t present when I am home. But loading that page this morning was an intolerable regression from what I’m accustomed to.
Custom MAC address
This is what I needed to do to get my USG to even talk to the internet and this is what stumped me the few times I had tried before. I probably would have figured it out sooner if I’d had more time and/or patience. At any rate, you need to create a /usr/lib/unifi/data/sites/default/config.gateway.json file with contents similar to the following (assuming you’re using the Cloud Key; if you run the controller software on a different system you’ll have to find the right spot):
{
    "interfaces": {
        "ethernet": {
            "eth2": {
                "mac": "00:00:00:00:00:00"
            }
        }
    }
}
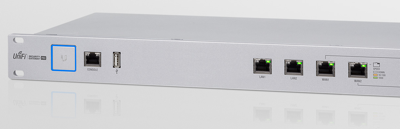
Change that MAC address to whatever you need it to be. Depending on the port, eth2 may not be correct. On my USG 4 Pro, eth2 is the WAN1 port which is what is connected to my cable modem. eth0 is LAN1. Note that this config.gateway.json file goes on the Cloud Key and once there you need to force-provision the USG and it will get copied over to it.
You can ssh into the USG and double-check by grepping for that interface:
admin@ubnt:/config/user-data$ ip addr|grep -A2 eth2:
4: eth2: <BROADCAST,MULTICAST,UP,LOWER_UP> mtu 1500 qdisc noqueue state UP
    link/ether 00:00:00:00:00:00 brd ff:ff:ff:ff:ff:ff
    inet 1.1.1./22 brd 255.255.255.255 scope global eth2
If it shows your external IP (1.1.1.1 in the above) and the right MAC address (00:00:00:00:00:00 in the above) then you’re good.
pfBlockerNG-like ad blocking
This one is easy enough and the credit comes from this article: How to integrate ad blocking using a Unifi USG.
You can get the instructions from there, but the update-adblock-dnsmasq.sh script I’ll include below has been updated to suit me better. For one, it’s using an old URL for the block list. Secondly, I don’t like the idea of calling out to the internet with curl as root so I changed that. Finally, I also made sure it validates the dnsmasq configuration before it restarts.
1 2 3 4 5 6 7 8 9 10 11 12 13 14 15 16 17 18 19 20 21 22 23 24 25 26 27 28 29 30 31 32 33 34 35 36 37 38 39 40 41 42 43 44 45 46 | #!/bin/bash # # original writeup: https://medium.com/server-guides/how-to-integrate-ad-blocking-using-a-unifi-usg-a165dc2233c1 # # note this script needs to run as root, but that doesn't mean everything # has to run as root if [ "$(whoami)" != "root" ]; then echo "Script must be run as root" exit 1 fi ad_list_url="https://pgl.yoyo.org/adservers/serverlist.php?hostformat=dnsmasq&showintro=0&mimetype=plaintext" #The IP address below should point to the IP of your router or to 0.0.0.0 pixelserv_ip="0.0.0.0" ad_file="/etc/dnsmasq.d/dnsmasq.adlist.conf" temp_ad_file=$(su -c "mktemp /tmp/nobody.XXXXXX" nobody) #temp_ad_file="/etc/dnsmasq.d/dnsmasq.adlist.conf.tmp" sudo -u nobody curl -s "${ad_list_url}" | sed "s/127\.0\.0\.1/${pixelserv_ip}/" > ${temp_ad_file} if [ -f "${temp_ad_file}" ]; then sed -i -e '/googleadservices\.com/d' ${temp_ad_file} sed -i -e '/doubleclick\.net/d' ${temp_ad_file} sed -i -e '/awin1\.com/d' ${temp_ad_file} cp -f ${temp_ad_file} ${ad_file} chmod 644 ${ad_file} else echo "Error building the ad list, please try again." exit 1 fi rm -f ${temp_ad_file} # before restarting, test the validation so we can remove the ad file if # it's going to cause problems if [ "$(dnsmasq --test >/dev/null 2>&1; echo $?)" == "0" ]; then /etc/init.d/dnsmasq force-reload else rm -f ${ad_file} echo "Removing ad configuration due to validation errors" exit 1 fi |
As the article notes, this should be placed in /config/user-data/ where you can run it the first time using sudo sh -x update-adblock-dnsmasq.sh so you can see what it does and if it spits out any errors. When that’s done, I added it to root’s crontab: sudo crontab -e.
admin@ubnt:/config/user-data$ sudo crontab -l
0 */24 * * * /opt/unifi/ips/bin/getsig.sh
56 4 * * 6 /config/user-data/update-adblock-dnsmasq.sh
The final question is why change from pfSense to USG? Honestly, I love pfSense. It is one of the best firewalls out there and arguably better than the USG. But the USG ties in so nicely with the UI and dashboards with the rest of my Unifi gear. With the USG I can get deep packet inspection and threat monitoring and it’s all in one spot. Yeah, I can get a lot of the same with pfSense but it’s disjointed and as I’m getting, ahem, older and with much less time on my hands (as evident through the fact that I really only blog around Christmas and my other times off!) I don’t want to fiddle as much. My fiddle time is reserved for LEGO these days =)
Not firewalls.
However, now that I have this thing working more or less the way that I want to, I’m sure I’ll be making more time to fiddle… at least in the next week and a half! Hopefully this is helpful to others thinking about either switching or standing up a USG of their own.